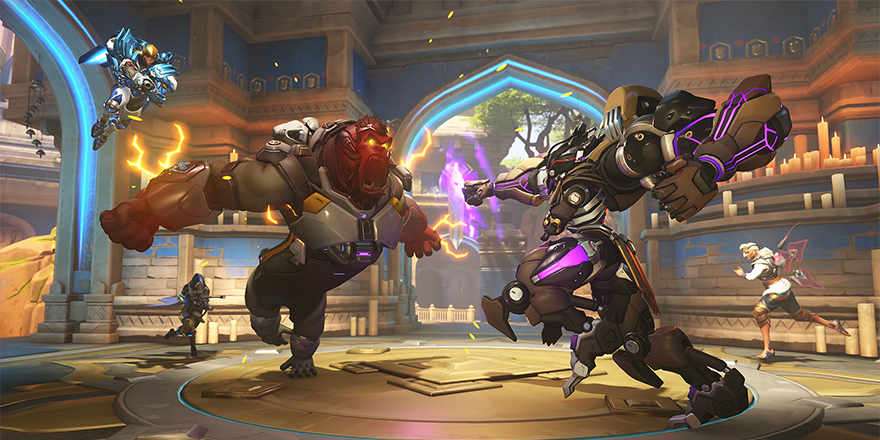
Create games in ways previously unimaginable with the Workshop! The Workshop is a simplified game scripting system that expands the customization features available in the Game Browser. Within the Workshop, you'll create a Script to add Rules and unique play Conditions on top of the established Overwatch game modes you already know and love. Rules can do many things, like change how a hero's movement and abilities work, modify how players are damaged or healed, or even display text under certain circumstances.
One hot game mode you can create is Molten Floor, where your hero will catch on fire if they're on the ground:
Table of Contents
- Accessing Workshop
- Creating a Script
- Debugging Your Script
- Sharing Your Script
- Opening a Script
- Tips and Tricks
Accessing Workshop
To access Workshop, click Play > Game Browser > Create > Settings > Workshop.
Creating a Script
To create a Script, you must:
Once you do this, you can add as many Rules, Conditions, and Actions as you have room for.
Adding a Rule
Rules are highly customizable pieces that make up your Script. Each Script must have one or more Rules.
Each Rule has an optional comment and contains:
- Event: Defines when the Rule will be executed. For more information, see Selecting an Event.
- Conditions: An optional list of things that must be true for the Rule to apply. For more information, see Adding a Condition.
- Actions: A list of things that happen when the Event and Conditions are met. For more information, see Adding an Action .
To add a Rule, click Add Rule.
Selecting an Event
An Event defines when the Rule will be executed. When an Event happens in-game, an Instance of the Rule is created. Each Instance evaluates Conditions and executes Actions independently of other Instances.
Once a Rule is created in the editor , an Event is automatically added. You must specify what type of Event you'd like.
To specify an Event type:
- Click the drop-down next to Event.
-
Select one of the following:
Event Type comment Ongoing - Global Creates a single Instance of this Rule when the game starts. This Instance remains active for the entirety of the game.
- Since the Instance remains active the entire game, a Condition may sometimes pass or sometimes fail. Once a Condition passes for the first time, the Actions will then execute.
- Whenever the list of Conditions fails and then passes again, the Actions will attempt to execute again.
Ongoing - Each Player Creates an Instance of this Rule for each player when they join the game. This Instance remains active until the player leaves or the game ends. Each Instance tracks and executes the Conditions and Actions separately.
- Since the Instance remains active as long as the player is in the game, a Condition may sometimes pass or sometimes fail. Once a Condition passes for the first time, the Actions will then execute.
- Whenever the list of Conditions fails and then passes again, the Actions will attempt to execute again.
Player Earned Elimination Executes the Rule whenever a player earns an elimination. Only one Instance of the Rule can be active on a specific player at a time.
- When a player eliminates someone, the Conditions are checked. If every Condition passes, the Actions execute. If any fail, the Actions don't execute.
Player Dealt Final Blow Executes the Rule whenever a player deals a final blow. Only one Instance of the Rule can be active on a specific player at a time.
- When a player deals the final blow to an opponent, the Conditions are checked. If every Condition passes, the Actions execute. If any fail, the Actions don't execute.
Player Dealt Damage Executes the Rule whenever a player deals damage. Only one Instance of the Rule can be active on a specific player at a time.
- When a player deals damage to an opponent, the Conditions are checked. If every Condition passes, the Actions execute. If any fail, the Actions don't execute.
Player Took Damage Executes the Rule whenever a player takes damage. Only one Instance of the Rule can be active on a specific player at a time.
- When a player takes damage from an opponent, the Conditions are checked. If every Condition passes, the Actions execute. If any fail, the Actions don't execute.
Player Died Executes the Rule whenever a player is killed. Only one Instance of the Rule can be active on a specific player at a time.
- When a player is killed, the Conditions are checked. If every Condition passes, the Actions execute. If any fail, the Actions don't execute.
-
If necessary, specify the Team or Player that should be impacted by this event. The options are:
Option comment All Event applies to all teams, including players in free-for-all modes Team 1 (or Current Team Name) Event only applies to members of this team Team 2 (or Current Team Name) Event only applies to members of this team Option comment All Event applies to all players Slot 0 through Slot 5 Event only applies to players in the specified slot. In a team-based game, two players may occupy one slot (one for each team). Slot 6 through Slot 11 Event only applies to players in the specified slot. This only applies in free-for-all game modes. Specific Hero Event will only apply to players who have spawned as that hero
Adding a Condition
After you've added a Rule and an Event, you have the option to add one or more Conditions. Conditions are a list of things that must be true before the Rule can execute its list of Actions. If the Condition belongs to a Rule with an Event type of "Ongoing - Global" or "Ongoing - Each Player," it's checked continuously to see if it's true. If it belongs to a Rule with any other type, it's checked whenever the specified Event occurs. If a Rule has no Conditions, the Action list will attempt to execute as soon as the Event occurs. Each Condition is made up of two Values, which use an Operator to compare and check to see whether or not they are True. See Values for more information.
To add a Condition:
- Click Add next to Conditions.
- Fill in the Value fields.
- Note: When a Value itself has an Input (such as the "Hero Of" Value, which needs to know the player from whom to acquire the hero), then the Input for that Value will show up indented below it.
- Select an Operator. The Operators are:
- == Equals
- != Doesn't equal
- > Is greater than
- >= Is greater than or equal to
- < Is less than
- <= Is less than or equal to
This checks whether or not the number of all players in the game is equal to the number of players that are alive.
- Value: "Number of Living Players", Checks for the total number of players who are alive
- Team: Team, Checks all players on a team
- Team: All, Checks all players on all teams
- Operator: ==, Means the first Value must be equal to the second Value for this Condition to return True
- Value: "Number of Living Players, Checks for the total number of Living Players
- Team: Team, Checks all players on a team
- Team: All, Checks all players on all teams
Other Examples
- IsFlagBeingCarried(Victim) == False: The player that was killed must not have been holding the flag
- IsCrouching(Event Player) == True: The player that the event is active on must be crouching
- NumberOfFinalBlows(Attacker) > 10: The player who's attacking has more than 10 final blows
Adding an Action
An Action is something that modifies the game. They are executed in order from top to bottom. For the list of Actions to start executing:
- The Event associated with the Rule must have occurred
- All Conditions of the Rule must be true (or there are no Conditions)
- If the Event type is "Ongoing - Global" or "Ongoing - Each Player," the list of Actions will execute when every Condition passes for the first time. Whenever the list of Conditions fails and then passes again, the Actions will attempt to execute again.
With the exception of the Wait Action (see Wait Action for more information), all Actions execute and finish immediately. Each Action is made of zero or more Inputs, which describe how the game is modified. Each Input is given a Value, which is a piece of information or an instruction on how to get information. For more information, see Values.
To add an Action:
- Click Add next to Actions.
- Select an Action, which describes how the game will be modified.
- Select a Value in the drop-down for each new Input that appeared.
- Note: Some Actions will create an object or ongoing behavior. Such Actions may have an Input called "Reevaluation." This Input determines whether the other Inputs for this Action are fixed (leaving the object or ongoing behavior unchanged) or dynamic (changing the object or ongoing behavior as the Value assigned to the Input changes).
Actions
- Pause Match Time: Pauses the time of the current match
- Modify the Global Variable(T, Add, 5): Increases the Global Variable T by 5
- Set Invisible(Event Player, Enemies): Makes the player executing this Rule invisible to enemies
Actions with a Reevaluation Input
- Create Icon(All Players(All Teams), Global Variable(P), Alert, Position): Create an Alert icon that's visible to everyone at the location specified by Global Variable "P". Reevaluate the Position continuously, so if the Global Variable "P" changes later, the icon's position will change to the new location.
- Create Icon(All Players(All Teams), Global Variable(P), Alert, None): Create an Alert icon that is visible to everyone at the location specified by Global Variable P. Do not reevaluate anything, so even if the global variable P changes later, do not update the position of the icon.
Action Types
Although there are many potential Actions, there are a few you should be aware of:
Loop is an Action that causes the execution of the list of Actions to restart from the beginning. There are four types of Loop Action:
- Loop: Always restart the Action list
- Loop If: Restarts the Action list if the Action’s Condition Input evaluates to a value other than 0 or False
- Loop if Condition Is True: Restarts the Action list if all of the Rule’s Conditions are currently passing
- Loop If Condition Is False: Restarts the Action list if any of the Rule’s Conditions are currently failing
A Loop Action is only allowed if a Wait Action is guaranteed to execute before the start of the Action list.
| Good | Bad |
|---|---|
|
This is allowed, since it waits before looping. |
This is not allowed, since it would execute forever without waiting. |
Wait is an Action that causes time to pass before a subsequent Action can execute. The minimum wait time is 0.25 seconds.
There are three behavior options for the Wait Action:
- Ignore Condition: If this is selected, the execution of the Actions can't be interrupted by Conditions or other Events.
- If the Event type is "Ongoing - Global" or "Ongoing - Each Player", Conditions transitioning between failing and passing will not cause anything to happen.
- If the Event is of any other type and an event of that type occurs with the same Event Player, the event is ignored entirely.
- Abort When False: If this is selected, the Action list stops executing if the Conditions start to fail.
- Restart When True: If this is selected, Action execution will reset to the first Action if one of the following happens:
- The Event type is "Ongoing - Global" or "Ongoing - Each Player" and the Conditions transition from failing to passing.
- The Event is of any other type, an event occurs with the same Event Player, and the Conditions all pass.
Additional Information
The String Value generates a string. It has the following Inputs:
- String: The text to display. If the text contains a number inside curly braces, it will be replaced with the Value provided to the corresponding Input.
- {0}: The Value that will be converted to text before replacing the {0} in the String. This Value may be of any type.
- {1}: The Value that will be converted to text before replacing the {1} in the String. This Value may be of any type.
- {2}: The Value that will be converted to text before replacing the {2} in the String. This Value may be of any type.
- String(“Hello”, Null, Null, Null): Produces the string “Hello”
- String(“{0} vs {1}”, Hero(Ana), Hero(Pharah), Null): Produces the string “Ana vs Pharah”
Strings can be combined to form more complex strings:
- String(“{0} vs {1}”, Hero(Ana), String("{0} and {1}", Hero(Pharah), Hero(Genji), Null), Null): Produces the string “Ana vs Pharah and Genji”
Strings can't be used in Conditions or stored into Variables because of complications with players using different languages in the same Custom Game.
A Value is a piece of information—or an instruction on how to obtain information—provided to the Input of a Condition, an Action, or another Value. Values can be combined with each other.
There are many, many Values, so we won't define them all here. However, they are defined in the Workshop Editor. Here are a few that you're likely to see:
| Value | comment |
|---|---|
| Number | Provides a real number in a range specified by the Input |
| Vector | Provides a three-dimensional value in a range specified by the Input. This is used for positions and directions. |
| Team | Indicates a specific team, such a Team 1, Team 2, or All Teams |
| Hero | Indicates a specific Hero |
| Null | Indicates the absence of a Player or Entity |
| True | Provides the value of True |
| False | Provides the value of False |
| Compare | Provides either True or False, depending on whether or not the comparison it describes was true or not |
| Event Player | Provides the Player that's executing the Instance of the Rule or Null if there's no such player |
| Attacker | Indicates the Attacker for the Instance of the Rule or Null if there isn't an Attacker |
| Victim | Indicates the Victim for the Instance of the Rule or Null if there isn't a Victim |
| Current Array Element | Provides the current Value being considered when used along with the If True For Any, If True For All, Filtered Array, or Sorted Array Value |
A Value may be stored into an Array, which is a collection of multiple Values.
- Several Actions and Values can create or modify an Array.
- For example, the "All Players" Value gives you an Array of every player currently in the game.
- You can also build your own arrays using the "Append To Array" operation of the "Modify Global Variable" Action or "Modify Player Variable" Action.
- If an Input expects an array but receives some other kind of Value, the Value is copied into an array of a single element for the benefit of the Input. Similarly, if an Input expects some other kind of Value but receives an array, the first Value in the array is used (or 0 if the array is empty).
A Variable is a place where a Value can be stored and retrieved later. With the exception of Strings, any Value can be stored in a Variable. All Variables start with a Number Value of 0.
There are two types of Variables in a Script:
- Global Variable: There are 26 Global Variables, named A through Z. Each Variable holds a separate Value or array of Values.
- Player Variable: Each Player has 26 Variables, named A through Z. Each Variable holds a separate Value or array of Values.
There are three operations that can be performed on a Variable:
- Setting: "Set Global Variable" and "Set Player Variable" will set the Variable to a new Value, replacing the previous Value.
- Modifying: "Modify Global Variable" and "Modify Player Variable" modify the Value in a Variable using a particular arithmetic operation (such as Add, Multiply, etc.) or Array operation (Append, Remove).
- Chasing: "Chase Global Variable Over Time", "Chase Player Variable Over Time", "Chase Global Variable at Rate", and "Chase Player Variable at Rate" gradually change the Variable over time or at a specified rate.
- The Destination for the Chase can be a Number or a Vector (or any Value that results in a Number or Vector).
- If the Destination is a Number, the Variable Value needs to be a Number before the Chase begins so that the Chase will work correctly.
- If the Destination is a Vector, the Variable Value needs to be a Vector before the Chase begins so that the Chase will work correctly.
- If Reevaluation is enabled for the Destination, the Chase will update as needed to pursue a changed Destination, even if the Destination had been reached before. For more information on Reevaluation, see Adding an Action.
- You can cancel a Chase using the "Stop Chasing Global Variable" Action and the "Stop Chasing Player Variable" Action.
- When a Chase is cancelled, the Variable keeps its current Value, which may be somewhere between what it was when the Chase began and the Destination.
- The Destination for the Chase can be a Number or a Vector (or any Value that results in a Number or Vector).
Examples
Ready to get into the Action? Try creating one of these game modes! We'll walk you through what you need to add and why:
We're going to walk you through creating Molten Floor, a game where heroes burn and take damage if they're on the ground.
- First, let's make sure you'll play the game on the desired map(s).
- Click Play > Game Browser > Create > Settings > Maps.
- Select the map you'd like to test the game on and disable all others.
- Next, enter your Workshop.
- Click Back.
- Click Workshop.
- Now it's time to make a Script! Let's add our first Rule.
- Click Add Rule.
- In the Comment section, enter Start Burning If On Ground. This lets you know that this Rule is what makes players start to burn when they touch the ground.
- Now, change the Event type so we know when this Rule should be executed.
- In the Event drop-down, select Ongoing - Each Player. This indicates that the Rule will be evaluated separately for every player in the game.
- Leave the other drop-downs with the default options.
- Now, let's add a Condition. This Condition will determine whether or not the Rule will execute. You can also just leave this empty if you always want the Rule to execute!
- Under Conditions, click Add.
- In the first Value drop-down, select Is On Ground. This value returns true whenever the player is on the ground.
- Leave all other drop-downs with the default options and click OK.
- Event Player means "The player that the Rule is currently running on".
- Finally, we'll add an Action. Actions are what happens if the Condition is true.
- This Action will make it so a hero will start to burn when on the ground.
- Under Actions, click Add.
- In the Action drop-down, select Set Status.
- In the Status drop-down, select Burning.
- Under Duration, change the number slider to 10,000.
- Leave all other drop-downs with the default options and click OK.
- This Action will make it so a hero will start to burn when on the ground.
- Let's test if your hero is on fire while on the ground!
- Click Back twice.
- On the Create Game screen, click Start.
- Select a hero.
- As soon as you enter the game, your hero should be on fire.
- Press Esc and click Open Workshop Editor to keep building your Script.
- Now, let's add another Rule that ensures a hero won't be on fire if they are jumping or in the air.
- Instead of adding a new Rule from the beginning, let's copy the last one we created.
- Next to the Rule you created, click Copy.

- Click Paste Rule.
- Change the decription to Stop Burning When In the Air. This lets you know that this Rule is what makes your hero stop burning when they are in the air or jumping.
- Keep the existing Event type.
- Now, let's edit the Condition. This Condition will determine whether or not the Rule will execute.
- Click the existing Condition that says "Is On Ground(Event Player) == True."
- In the Value drop-down, select False.
- Leave all other drop-downs with the existing options and click OK.
- Next, let's edit the Action. This Action will make it so your hero will stop being on fire if they're not on the ground.
- Click the existing Action that says "Set Status (Event Player, Null, Burning, 10000)."
- In the Action drop-down, select Clear Status.
- In the Status drop-down, select Burning.
- Leave all other drop-downs with the existing options and click OK.
- Let's test if the hero stops being on fire when in air!
- Click Back twice.
- As soon as you enter the game, your hero should be on fire. Jump and see if your hero is no longer on fire.
- Press Esc and click Open Workshop Editor to keep building your Script.
- Finally, we'll start to damage a hero while they're on the ground.
- Expand the "Start Burning If On Ground" Rule.
- Under Actions, click Add. This Action will make the hero take damage while on the ground.
- In the Action drop-down, select Damage Over Time.
- Under Duration, change the number slider to 9999.
- Under Damage Per Second, change the number slider to 30.
- Leave all other drop-downs with the default options and click OK.
- Expand to the "Stop Burning If Not On Ground" Rule.
- Under Actions, click Add . This Action will make the hero stop taking damage while not on the ground.
- In the Action drop-down, select Stop All Damage Over Time .
- Let's test if your hero takes damage while on the ground and doesn't take damage while in the air or jumping.
- Click Back twice.
- Exit the spawn room and see if your hero begins taking damage.
- Jump and see if your her stopped taking damage.
- You did it! The floor is now lava!
Here's a more extensive walk through of a game mode, Mirrored Deathmatch. In this game, there are multiple short rounds where everyone plays the same hero. At the end of each round, each player respawns where they were as the next hero in a randomized, predetermined list. When the final round ends, the player with the most kills wins.
For example, in one match, everyone might start as McCree and then switch to Pharah in the second round. In a different match, they might start as Widowmaker and then switch to Ashe in the second round. Because of how this list is generated, it's unlikely that you'll ever play through the same list of heroes twice!
So, let's make a Script for Mirrored Deathmatch!
- Click Play > Game Browser > Create > Settings > Workshop.
- First, we'll create the Rule that makes a list of heroes that can potentially be played.
- This list will be stored in Global Variable "L" as an Array.
- Arrays can be anything, like a list of players, a list of heroes, a list of numbers, a single value, or even no values at all (known as an “empty” array).
- Each value in the array is stored at a unique Index starting at 0 and counting up. An index and its value are sometimes referred to as an Element.
- The order of an array matters, so
[Reaper, Winston, Mercy]is a different array than[Mercy, Winston, Reaper]. - Arrays may contain a mixture of types. For example, it’s possible to have the following array:
[123, Reaper, True, -4.5]. - If an Input expects an Array, but a single Value is provided, the Input will receive that single Value packed into an Array of one Element.
- If an Input expects a single Value but is provided an Array, the Input will receive the first Value in the Array (or 0 if the Array is empty).
- Add a Rule and enter a comment so you know what this Rule will do.
- Set the Event type to Ongoing - Global. This means only a single instance of this Rule will be executed.
- Since the Rule doesn't have any Conditions, it will start executing as soon as the game starts.
- Add an Action with:
- Action: Set Global Variable
- Variable: L
- Value: Hero
- Hero: A hero you'd like to be playable.
- Action: Set Global Variable
- Only having one playable hero in the game would be boring, so let's add more! Add as many Actions as you'd like with:
- Action: Modify Global Variable
- Variable: L
- Operation: Append
- Value: Hero
- Hero: A hero you'd like to be playable.
[0, Pharah, Hanzo, Ana,...]. - Action: Modify Global Variable
- Let's add the last Action for this Rule. This Rule will take a randomized copy of Global Variable L (the Array of heroes), copy a part of the now randomized Array starting at the 0 position, and include the number of heroes the game mode should have. This copy is then stored back into Global Variable L, resulting in a randomly shuffled subset of the original list of heroes you provided.
- For Example: If the initial hero list were
[Ashe, Doomfist, Hanzo, McCree, Pharah, Soldier: 76, Zenyatta, Widowmaker, Ana], the randomized Array might be[Hanzo, Pharah, Widowmaker, Ana, Ashe, Doomfist, Soldier: 76, Zenyatta, McCree], and the slice might be[Hanzo, Pharah, Widowmaker, Ana, Ashe, Doomfist].
- For Example: If the initial hero list were
- This list will be stored in Global Variable "L" as an Array.
- The next Rule guarantees that, no matter what, every player is playing the same hero at all all times.
- Add a Rule and enter a comment so you know what this Rule will do.
- Set the Event type to Ongoing - Each Player. This means each player will execute their own Instance of the Rule.
- Add two Conditions, which must be true for the hero to be forced:
- The number of the round, Global Variable "R", must be less than the total number of heroes in the hero list. If it isn't, the game is finished, and no more heroes will be forced. The round number starts at 0 and counts up, so if there are 6 rounds, the final round number is 5. It's okay that Global Variable "R" is never set to 0 since all variables start with a default value of 0.
- Value: Global Variable
- Variable: R
- Operator: <
- Value: Count Of
- Array: Global Variable
- Variable: L
- Array: Global Variable
- Value: Global Variable
- This checks to see if the hero currently being played by a given player must be different than the desired hero for that round number. The "given player" is represented by Event Player, a special Value that refers to the player currently executing an Instance of the Rule. The "desired hero" for the current round is the hero stored at the corresponding index of the hero list (Global Variable "L"). Since the current round is stored in Global Variable "R," the desired hero can be obtained using "Value In Array".
- Value: Hero Of
- Player: Event Player
- Operator: !=
- Value: Value in Array
- Array: Global Variable
- Variable: L
- Index: Global Variable
- Variable: R
- Array: Global Variable
- Value: Hero Of
- The number of the round, Global Variable "R", must be less than the total number of heroes in the hero list. If it isn't, the game is finished, and no more heroes will be forced. The round number starts at 0 and counts up, so if there are 6 rounds, the final round number is 5. It's okay that Global Variable "R" is never set to 0 since all variables start with a default value of 0.
- Once we know the player must change heroes, add two Actions that will execute:
- The first Action will force the Event Player to the desired hero. The first Input in this Action is the player whose hero should be forced. The second Input is the hero, so the desired hero is provided.
- Action: Start Forcing Player To Be Hero
- Player: Event Player
- Hero: Value In Array
- Array: Global Variable
- Variable: L
- Index: Global Variable
- Variable: R
- Array: Global Variable
- The second Action preloads the next hero in the list so the player doesn't experience a long delay before seeing their hero switch. Each player preloads the hero separately, even though everyone will play the same hero. This is because each player might need to preload a different skin for the hero. The use of the Add value to add 1 to Global Variable "R" instructs the Action to preload the next hero rather than the current hero. On the last round, this will yield an Array Index that's out-of-bounds for the Array Global Variable "L". This is okay since all out-of-bounds values for an Array are considered to be 0, so any Action that expects a hero and receives 0 just won't do anything.
- Action: Preload Hero
- Player: Event Player
- Hero: Value In Array
- Array: Global Variable
- Variable: L
- Index: Add
- Value: Global Variable
- Variable: R
- Value: Number
- Number: 1.00
- Value: Global Variable
- Array: Global Variable
- The first Action will force the Event Player to the desired hero. The first Input in this Action is the player whose hero should be forced. The second Input is the hero, so the desired hero is provided.
- The next Rule we'll make sets up each round if it hasn't been initialized yet.
- Add a Rule and enter a comment so you know what this Rule will do.
- Set the Event type to Ongoing - Global. This means only a single instance of this Rule will be executed.
- Add three Conditions, which must be true for the round to start:
- The game must be in progress. This means that the Assemble Heroes screen and Setup time have already occurred, but the game hasn't finished yet.
- Value: Is Game In Progress
- Operator: ==
- Value: True
- The Global Variable I must be False. This variable is used to indicate if the current round is initialized. If the Global Variable I has never been set, it will have a value of 0, which is equivalent to False in comparisons like this.
- Value: Global Variable
- Variable: I
- Operator: ==
- Value: False
- Value: Global Variable
- The round number, Global Variable "R", must be less than the total number of heroes in the hero list.
- Value: Global Variable
- Variable: R
- Operator: <
- Value: Count Of
- Array: Global Variable
- Variable: L
- Array: Global Variable
- Value: Global Variable
- The game must be in progress. This means that the Assemble Heroes screen and Setup time have already occurred, but the game hasn't finished yet.
- Once we know the Conditions are all true, the round needs to be initialized. Add a few Actions that will do that:
- The first Action tells the core game mode that the match shouldn't end because of normal criteria. For a Deathmatch, it means the game won't end because time runs out or someone reaches the score limit. Once this Action executes, the match won't end until the script re-enables the built-in game more completion or a winner is explicitly declared.
- Action: Disable Built-in Game Mode Completion
- The next Action sets the game mode's current timer to the length of a round.
- Action: Set Match Time
- Time: Number
- Number: 60.00
- This Action sets the Global Variable "I" to True so initialization won't happen again until Global Variable "I" is set back to False.
- Action: Set Global Variable
- Variable: I
- Value: True
- The first Action tells the core game mode that the match shouldn't end because of normal criteria. For a Deathmatch, it means the game won't end because time runs out or someone reaches the score limit. Once this Action executes, the match won't end until the script re-enables the built-in game more completion or a winner is explicitly declared.
- This Rule waits for the time to run out in the current round before advancing to the next one.
- Add a Rule and enter a comment so you know what this Rule will do.
- Set the Event type to Ongoing - Global. This means only a single instance of this Rule will be executed.
- Add two Conditions, which must be true for the game to advance to the next round:
- The game must be in progress. This means that the Assemble Heroes screen and Setup time have already occurred, but the game hasn't finished yet.
- Value: Is Game In Progress
- Operator: ==
- Value: True
- The current match time must be 0, meaning time in the round has run out.
- Value: Match Time
- Operator: ==
- Value: Number
- Number: 0.00
- The game must be in progress. This means that the Assemble Heroes screen and Setup time have already occurred, but the game hasn't finished yet.
- In response to these Conditions being true and the round being over, the match will advance the round number and mark the round as uninitialized. Add two Actions to do this:
- This Action lets the other Rules know that the match has transitioned to the next round.
- Action: Modify Global Variable
- Variable: R
- Operation: Add
- Value: Number
- Number: 1.00
- This Action sets Global Variable "I" to False, letting the other Rules know that a new round needs to be initialized.
- Action: Set Global Variable
- Variable: I
- Value: False
- This Action lets the other Rules know that the match has transitioned to the next round.
- The final Rule ends the match when all rounds have been played.
- Add a Rule and enter a comment so you know what this Rule will do.
- Set the Event type to Ongoing - Global. This means only a single instance of this Rule will be executed.
- Add one Condition, which will check to see if Global Variable "R" equals the number of elements in Global Variable "L." If it does, it means that a round has been played for each hero on the hero list. When this happens, the match should end.
- Value: Global Variable
- Variable: R
- Operator: ==
- Value: Count Of
- Array: Global Variable
- Variable: L
- Array: Global Variable
- Value: Global Variable
- Once the Condition is true, this Action will re-enable built-in game mode completion. Since the timer will be at 0, the game mode will immediately finish the match and the standard end-of-match flow will begin.
- Action: Enable Built-in Game Mode Completion
Debugging Your Script
Once you've created a Script, you can use the Workshop Inspector to view your Script executing in-game, see what Actions and Conditions are active, and view any issues with your Script.
To access the Workshop Inspector:
- Begin a game with the Script you created.
- Press Esc.
- Press Open Script Debugger.
- Press Enable. This feature is not enabled by default.
The Workshop Inspector is composed of a few things:
- Entry: The Entry lets you know what is happening
- Comment: This displays the comment associated with the Rule.
- Condition: Lists what Conditions need to pass in order for Actions to execute
- Action: Lists what Action executed
- Timeline Scrubber: The Timeline Scrubber allows you to move forwards or backwards in time through the game's progress.
Sharing Your Script
Once you've created an awesome Script, you can share it with the world (or just your friends) for the next six months. The scripts you create can be used on any platform, regardless of which platform you made it on.
To share a Script:
- Click Play > Game Browser > Create > Settings > Share
 .
. - Click Copy.
- Send the link to others!
Opening a Script
If someone has shared a Script that you'd like to use:
- Click Play > Game Browser > Create > Settings > Import
 .
. - Enter the link.
- Click OK.
Tips and Tricks
- It's easier to access the Workshop Inspector if you set a keybinding for it. To do this, click Esc > Options > Controls. Scroll down until you see Open Workshop Inspector and bind a key.
- Workshop Inspector will not only tell you what happened, but also what didn't happen (and why)!
- Don’t forget about the preset games! There may be certain settings already provided that you can use instead of coming up with a new solution by hand.
- If an Event isn't firing as expected, your Event Player may already be executing the list of Actions. Take a look at the Wait Action(s) in your Rule, especially if any are set up to ignore Conditions.
- To pick a specific location on the map, use the "Vector" Value and click the Camera icon.
- The "Has Spawned" Value is useful if you only want logic to run after a player has a hero in the game.
- If you only want your Rules to execute after the Setup and Assemble Heroes phases of the game, use the "Is Game In Progress" Value.
- Assigning a Value to a Variable and watching it in the Workshop Inspector is often the easiest way to understand what the Value is returning during gameplay.
- You can store the last created effect or icon into a Player Variable using the "Last Created Entity" Value. This lets you reference the entity later for destruction.
- Combining Filtered Arrays with Values such as "All Players On Objective" or "Players Within Radius" allows you to easily filter players who meet certain criteria (dead, alive, status effect, etc.).
- If you need branching behavior, you can use the "Skip If" Action to skip any number of Actions if a given Condition is true. If you do this, the skipped Actions may need to include an "Abort" Action to prevent both branches from executing.
- You can filter through the drop-down lists by typing.
- If your Value expects an Array as a parameter but doesn’t receive one, it will cast the Input into an Array of size one.
- The same goes for the reverse. If your Value expects a single piece of data but receives an Array, it will use the element in the 0 position of that Array.
- Splitting your work into multiple Actions or Conditions will help you more easily figure out what is going wrong.
- If you're unsure what an Action, Value, or Input does, you can mouse-over it on PC or choose "Show Details" on console to see an explanation.
- Always fill out the Comment section so you remember what your Rule is doing!
- Test often!
